Calling the Microsoft Graph API within Azure Data Factory (ADF)
August 17th, 2021
I recently had a request to call the Microsoft Graph API from within Azure Data Factory to store user data within an Azure Data Lake. There are a couple prerequisites required but overall, is relatively simple process and can easily be added to any ADF pipeline.
Prerequisites
- An Azure AD tenant, with permissions to register an application and grant access to the Graph API.
- A location to save Graph API exported data, and a dataset to support this saving.
Disclaimers
- Key vault is considered out of scope for this tutorial. Do not store any keys in plain text and use key vault to retrieve the application secret when calling the pipeline created in this keyvault.
- OData paging will not be covered by this tutorial. This will be added in a future post probably. This purpose of this tutorial is to demonstrate the OAuth authentication flow and simple iteration through the data returned by the Graph API.
Authentication Flow
The Graph API, like many other web services, uses OAuth 2.0 for authentication. That means that all requests to the Microsoft Graph API must be authenticated using a valid OAuth mechanism. The Graph API supports Delegated Permissions and Application Permissions. We will use the Application Permission token request flow.
The general flow of the Azure Data Factory pipeline will be as follows:
- Request an access token using the Azure AD Service Principal
- Call the Graph API route that has the data you're interested in
Detailed Steps
Azure AD Setup
Open the Azure Portal
Open the Azure Active Directory Blade
Click App Registrations

Click New Registration

Type in an application name and then click Register

Take note of the Application ID (sometimes called the client ID) and the Tenant ID.

Create a client secret. This is the secret that will be used to authenticate against the Azure AD OAuth endpoint to request an access token.


Important: You must copy the secret value. It can only be viewed once.
Now it's time to grant the permissions to the application. These permissions detail what the app can access, both with delegated permissions and application permissions.

Select the application/permission that you would like to grant. Likely it's the Graph API, but you can select other permissions if you'd like.


Remember: The application permission set is what we want to grant. Delegated access is used for interactive logins such as websites or user applications. ADF will use an application permission as it has no interactive login.
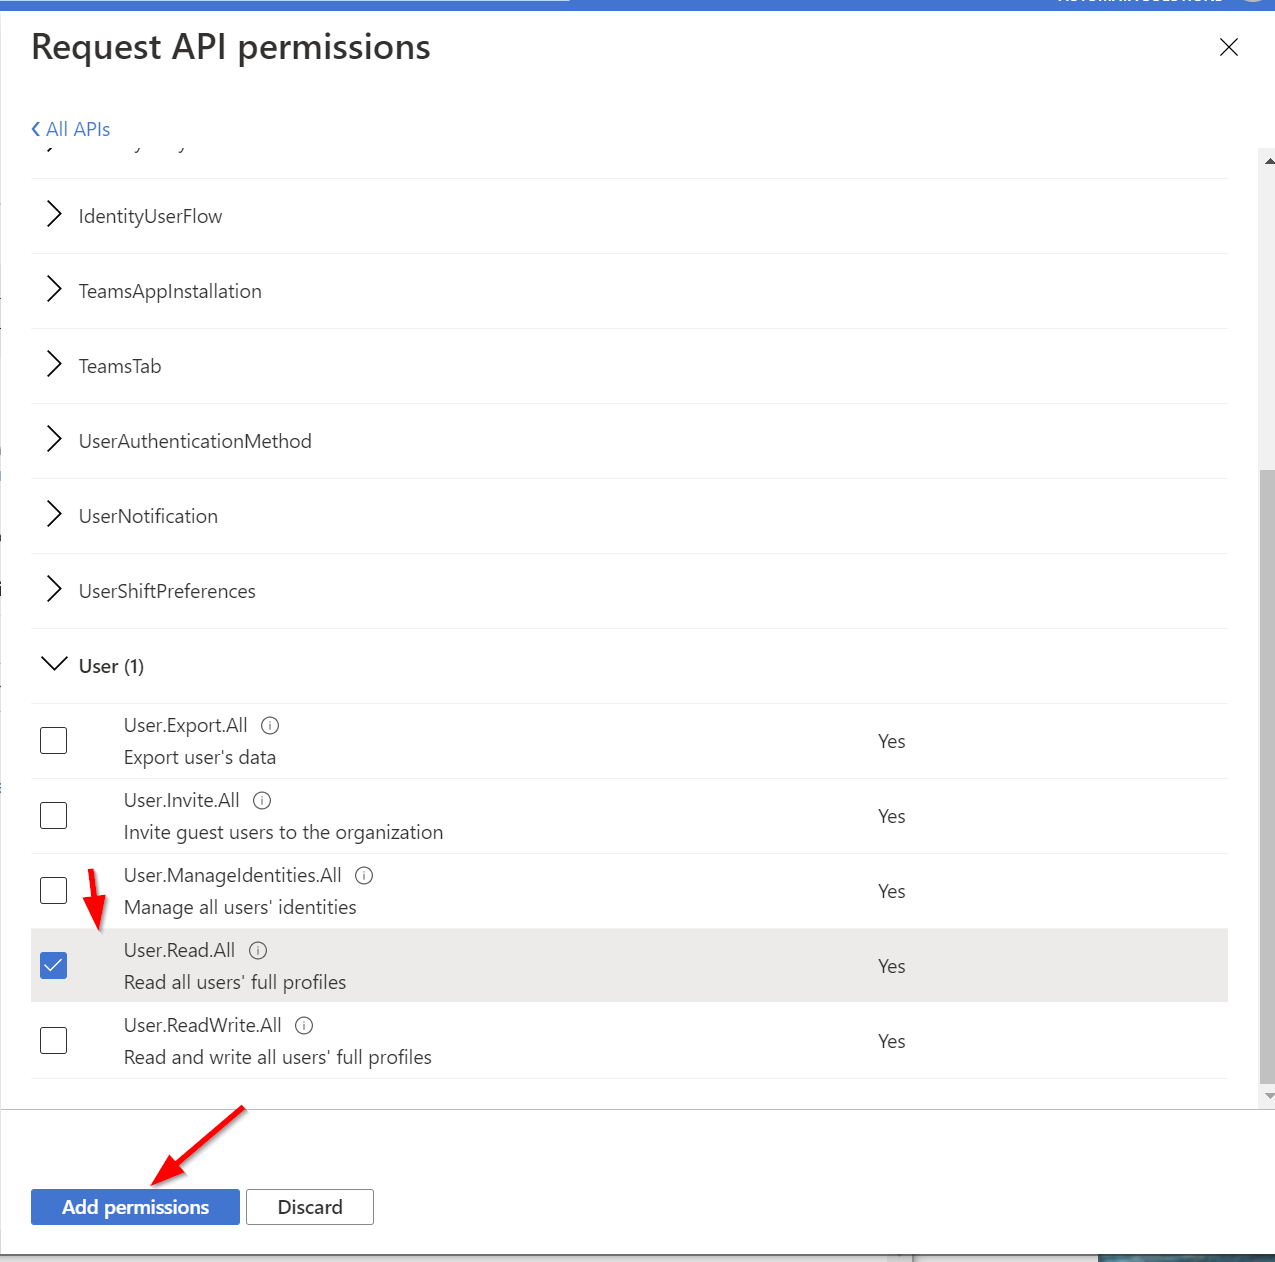
Select the specific permission you'd like to grant. This can be anything that the graph API offers. For our example, we'll just read all user data.
Admin authorize the application.


Azure Data Factory Pipeline
Now that we've setup the Azure AD service principal, we can move on to creating the Azure Data Factory pipeline.
Note: A synapse pipeline would work exactly the same. However, the ARM resource types in the provided JSON pipeline definitions would be slightly different.
Open ADF
Create a new pipeline
Set up the following pipeline parameters:
- AppID (String)
- AppSecret (String)
- TenantID (String)

"parameters": {
    "AppID": {
        "type": "string"
    },
    "AppSecret": {
        "type": "string"
    },
    "TenantID": {
        "type": "string"
    }
},
Create a Web Activity that authenticates to Azure AD and requests an access token. Name it OAuthentication. (Json definition below for reference).
Important: The name of this activity matters. The name is used as a reference to retrieve the output, specifically the access token.
{
    "name": "OAuthAuthentication",
    "description": "This step authenticates the service principal to call the graph API",
    "type": "WebActivity",
    "dependsOn": [],
    "policy": {
        "timeout": "0.00:05:00",
        "retry": 1,
        "retryIntervalInSeconds": 30,
        "secureOutput": false,
        "secureInput": false
    },
    "userProperties": [],
    "typeProperties": {
        "url": {
            "value": "@concat('https://login.microsoftonline.com/',pipeline().parameters.TenantID,'/oauth2/v2.0/token')",
            "type": "Expression"
        },
        "method": "POST",
        "headers": {
            "Content-Type": "application/x-www-form-urlencoded"
        },
        "body": {
            "value": "@concat('client_id=',pipeline().parameters.AppID,'&scope=https%3A%2F%2Fgraph.microsoft.com%2F.default&client_secret=',pipeline().parameters.AppSecret,'&grant_type=client_credentials')",
            "type": "Expression"
        }
    }
}
Under Settings, enter in the URL as an expression (Click Add Dynamic Content)
@concat('https://login.microsoftonline.com/',pipeline().parameters.TenantID,'/oauth2/v2.0/token')Add a new header, with the name of
Content-Type, and the value asapplication/x-www-form-urlencodedSet the Body to the following expression:
@concat('client_id=',pipeline().parameters.AppID,'&scope=https%3A%2F%2Fgraph.microsoft.com%2F.default&client_secret=',pipeline().parameters.AppSecret,'&grant_type=client_credentials')After all settings are entered, your settings pane should look like the following:

Okay bear with me, this is going to be an adventure into linked services and data sets. We're going to create a generic HTTP OAuth linked service, and then a Graph API data set. Using that data set, we'll invoke a copy activity to actually copy the data to the data lake.
So let's start with the linked service.

Create the Generic HTTP Linked service.


Create the Generic Graph API Data set


Set the BaseURL parameter to
https://graph.microsoft.comSet the Relative URL to
@dataset().GraphAPIRoute
Create a parameter:

Okay. we should be done with the linked service and data set. Here is the data set JSON, for reference.
{
    "name": "HTTP_GraphAPI_Data",
    "properties": {
        "linkedServiceName": {
            "referenceName": "HTTP_Generic_LinkedService",
            "type": "LinkedServiceReference",
            "parameters": {
                "BaseURL": {
                    "value": "https://graph.microsoft.com",
                    "type": "Expression"
                }
            }
        },
        "parameters": {
            "GraphAPIRoute": {
                "type": "string",
                "defaultValue": "/v1.0/users"
            }
        },
        "folder": {
            "name": "BuiltIn"
        },
        "annotations": [],
        "type": "Json",
        "typeProperties": {
            "location": {
                "type": "HttpServerLocation",
                "relativeUrl": {
                    "value": "@dataset().GraphAPIRoute",
                    "type": "Expression"
                }
            }
        },
        "schema": {}
    },
    "type": "Microsoft.DataFactory/factories/datasets"
}
Go back to our pipeline, and create a copy activity. This copy activity will be the thing doing the actual work to get our graph response to the data lake.

Set the source to our HTTP Graph API generic data set. Set the GraphAPIRoute parameter to the route you'd like to call. In our case, it'll be
/v1.0/users. Set the additional headers to the following expression:Authorization: Bearer @{activity('OAuthAuthentication').output.access_token}
Set the sink to the destination you'd like to save the file. In our case, we have a generic CSV dataset that we will use. (You can use anything though). I've included the JSON for this dataset for reference:
{
    "name": "CSV_File",
    "properties": {
        "linkedServiceName": {
            "referenceName": "AzureDataLakeShared",
            "type": "LinkedServiceReference"
        },
        "parameters": {
            "Container": {
                "type": "string"
            },
            "Directory": {
                "type": "string"
            },
            "File": {
                "type": "string"
            }
        },
        "folder": {
            "name": "BuiltIn"
        },
        "annotations": [],
        "type": "DelimitedText",
        "typeProperties": {
            "location": {
                "type": "AzureBlobFSLocation",
                "fileName": {
                    "value": "@dataset().File",
                    "type": "Expression"
                },
                "folderPath": {
                    "value": "@dataset().Directory",
                    "type": "Expression"
                },
                "fileSystem": {
                    "value": "@dataset().Container",
                    "type": "Expression"
                }
            },
            "columnDelimiter": ",",
            "escapeChar": "\\",
            "firstRowAsHeader": true,
            "quoteChar": "\""
        },
        "schema": []
    },
    "type": "Microsoft.DataFactory/factories/datasets"
}
Set the mapping of the copy. In our case, we must manually specify the mapping. Depending on your destination dataset type, you may not have to.

Note: Using the Microsoft Graph Explorer can help determine which fields you'd like to save and map.
Testing
Okay! We have a pipeline that looks generally like this:
Now we need to test it. Hit that big ol' debug button and enter in the values for the service principal.
Important: In production, create a pipeline that executes the pipeline that we created with the parameters set, and use key vault to retrieve the application secret.

Wait for it to complete, and let's check out the data lake location!

Off to the data lake! There it is!

A quick preview:

And there we have it!
Important: Make sure to publish your changes so you don't lose them!
Summary
So what did we do? We created a pipeline that 1) Authenticated with Azure AD using an Azure AD Service Principal, 2) created a generic Graph API dataset that used an HTTP linked service to 3) download graph user data and 4) save it into an ADLS gen2 data lake.
Now you can use this data in any transformations, or other data warehouse tasks that you'd like. Using the Graph API from within ADF allows you to centrally manage these web requests like any other data service within your orgnization, benifiting from the capabilities like monitoring and scale that comes with using ADF.